[Legacy] Flows – Defining lifecycle stages and conversion goals
IMPORTANT UPDATE: "Flows" are now a "legacy" tool in ConvertFlow, meaning they're only accessible to those who had access to them in the past. Flow campaigns strived to help visualize the logic and progression of lifecycle campaigns in a flow chart style interface, but ultimately were not adopted nearly as much as ConvertFlow's other campaign creator, Broadcasts.
After interviewing and studying the marketing workflows of ConvertFlow's most active customers, we launched a feature called Visitor Segments, which you can use to define dynamic segments (such as lifecycle stages) with the conditions interface, and easily target your campaigns to them.
The Visitor Segments feature is inspired by the dynamic audiences/segments you can create in other marketing tools such as Hubspot, Intercom and Segment. Moving forward, we've doubled down on Broadcasts for managing campaigns, adding new features such as broadcast templates and grouping, and can now focus our team's attention on evolving Broadcasts as ConvertFlow's campaign manager.
[Legacy] How to use the flows campaign tool
Flows are advanced campaigns made for launching lifecycle CTAs.
With it, you can define lifecycle stages, create CTA goals for each stage, set conditional progression rules and get granular reports for your entire flow, from one visual builder.
Your Flow stages:
The interface is made to be similar to email automation tools you already use like Drip, ActiveCampaign, Infusionsoft etc.
However, it is fundamentally different. You’re building out an automated funnel for lifecycle calls-to-action that are displayed on your website, rather than step-by-step email sequences.
This means progression is far more action based, rather than time based.
Essentially, you’re building this:
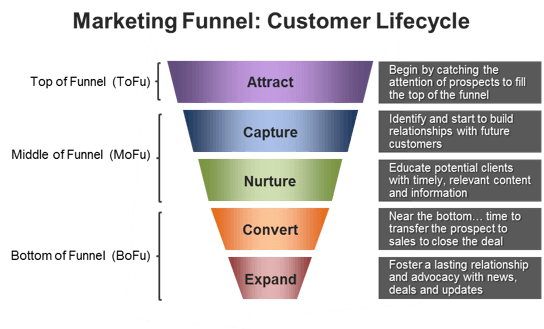
By breaking down your conversion funnel into multiple stages, top, middle and bottom of the funnel, you can drive more conversions by focusing your website calls-to-action for visitors at each stage of the lifecycle.
These calls-to-action may be:
Top of the Funnel
- Newsletter subscribe
- Lead magnets / Ebook opt-ins
- Questions / polls / surveys / quizzes
- Content segmentation & suggestions
- Discount offers
- Contests and promotions
Middle of the Funnel
- Product purchase CTAs
- Cart abandonment CTAs
- Webinar registration
- Consultation / appointment requests
- Content suggestions
- Testimonial CTAs
- Sales live chat
Bottom of the Funnel
- Product upsells / cross-sells / down-sells
- Referral program invitations
- Onboarding messages
- Company updates and announcements
- Support live chat
How to use Flows:
Once you create a new Flow, you’ll be asked to create your first stage.
“Stages”, are the ordered parts of your flow that contain goals related to a certain lifecycle stage.
You may name your flow’s first stage something like “New visitors”, “Top of funnel”, etc.
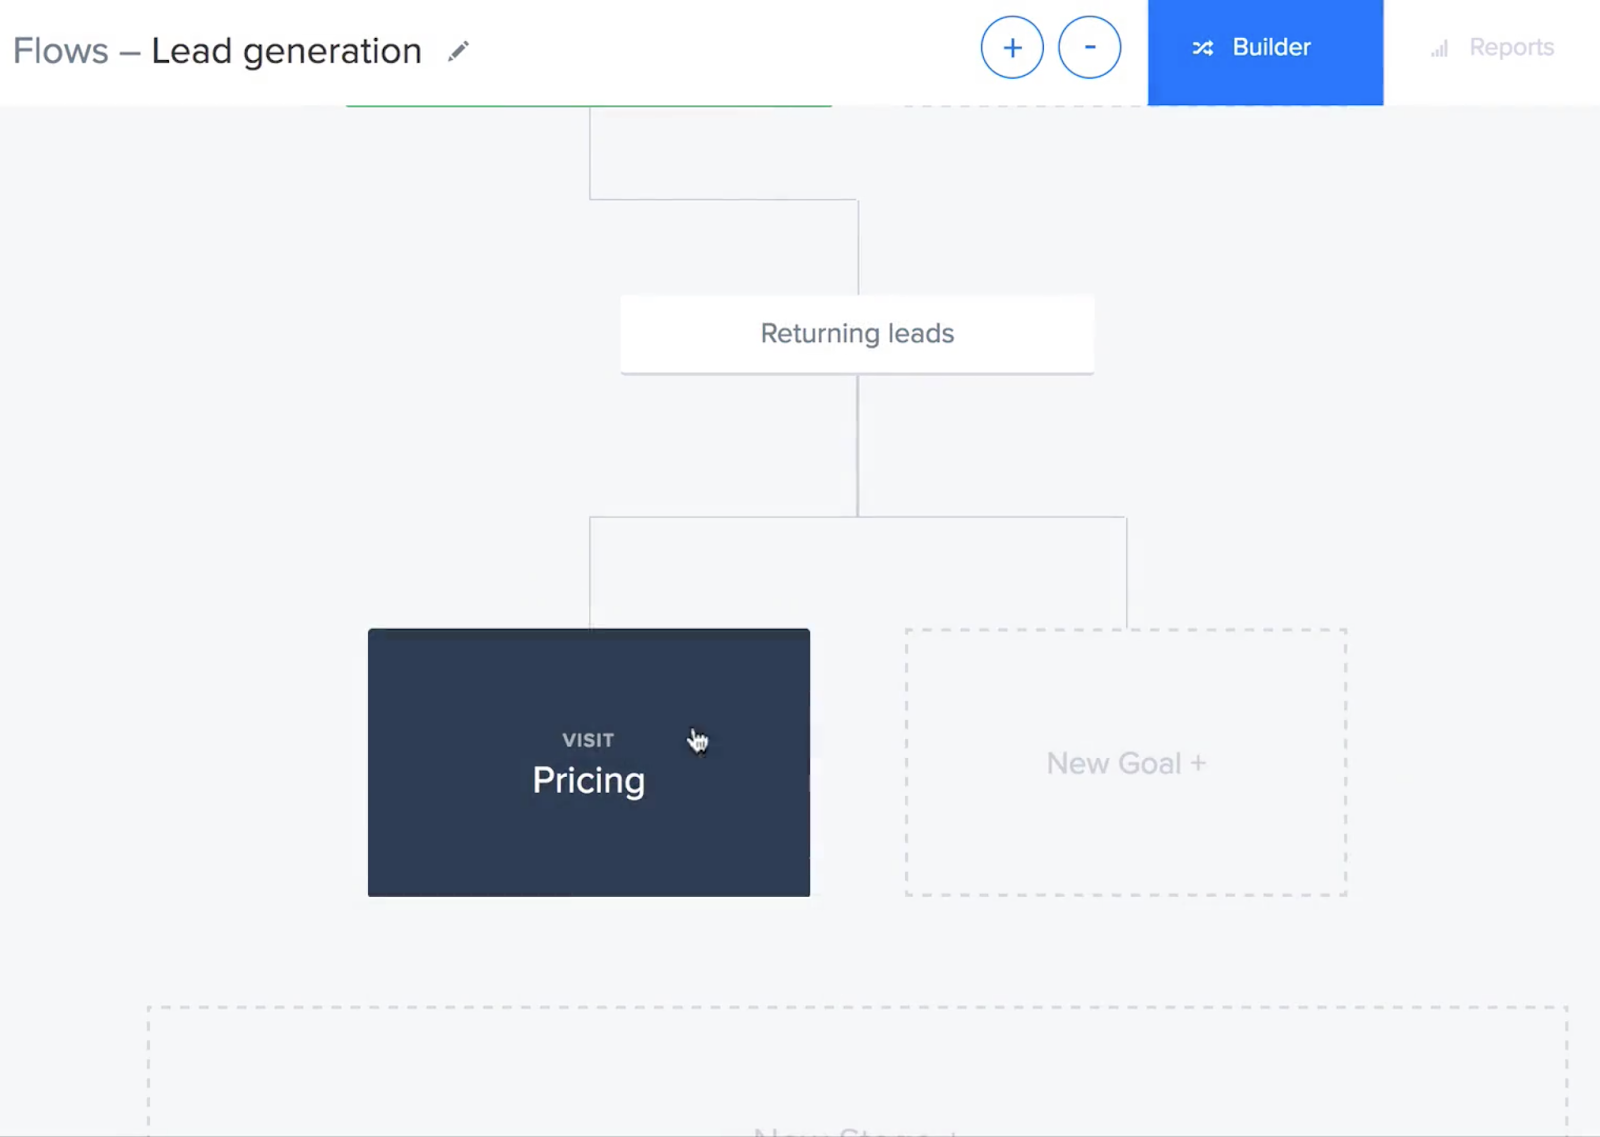
Once you’ve created your stage, you can now add a “Goal” to your stage.
Goals are certain actions in your flow that you want visitors to complete, to progress them to the next stage.
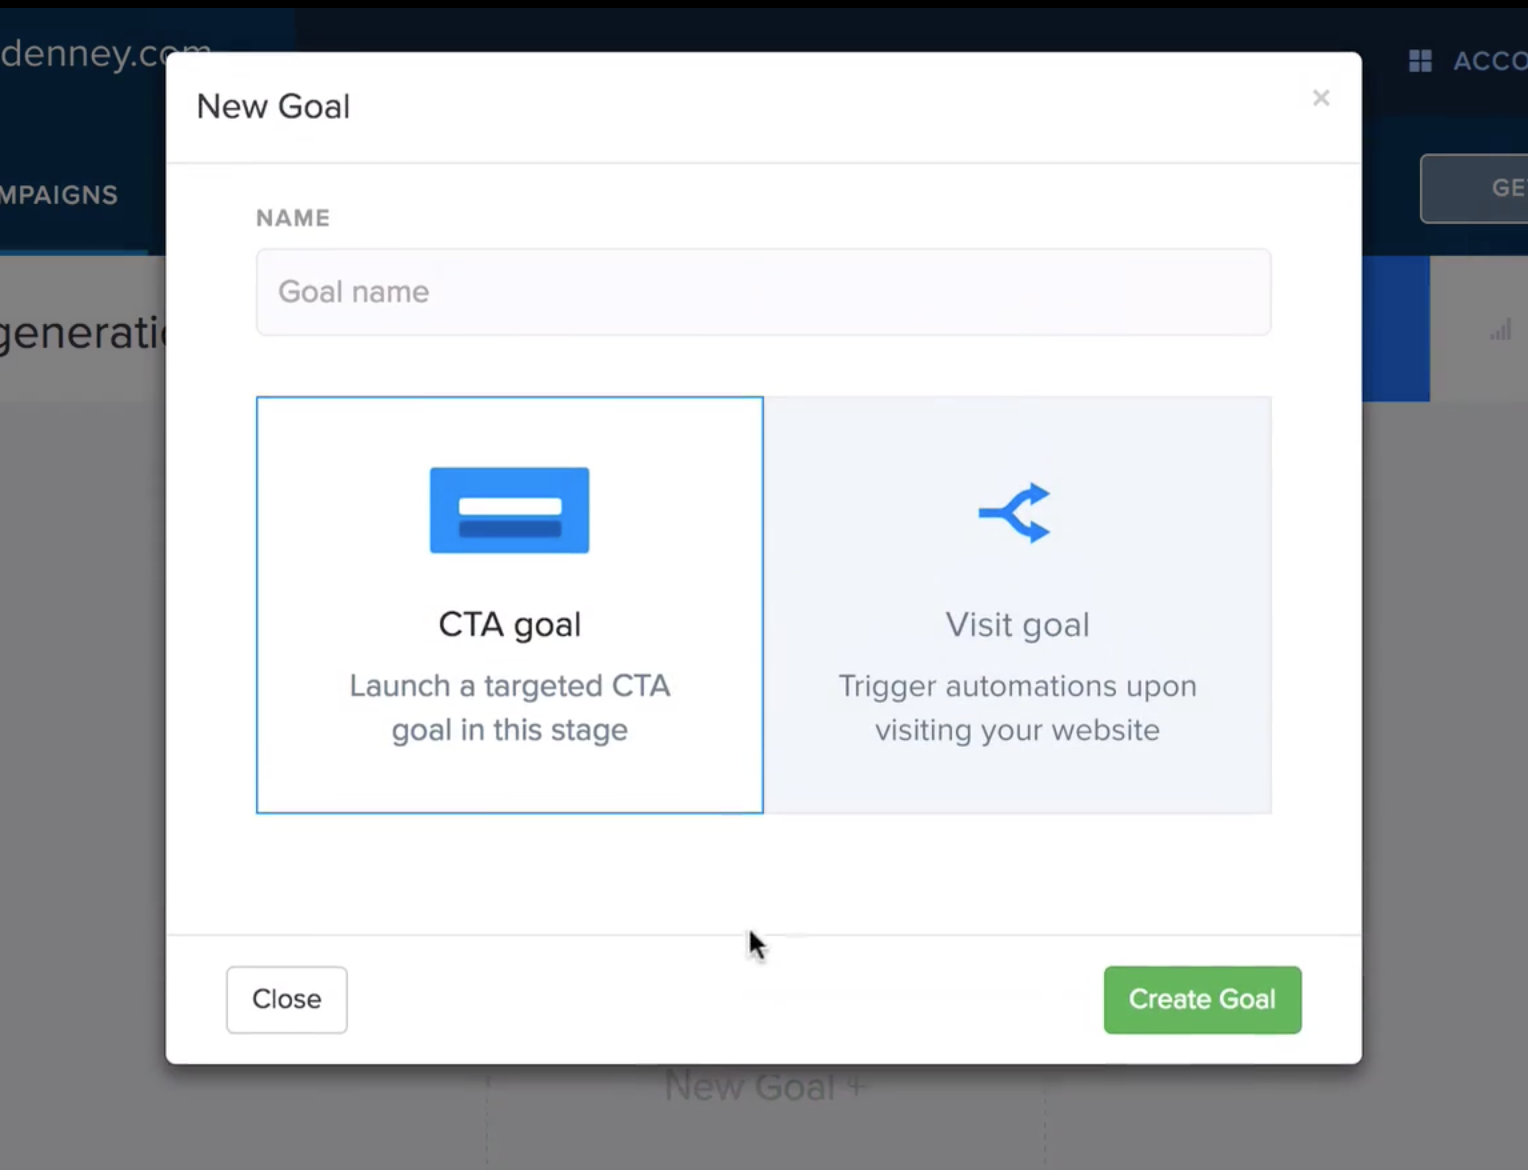
There are 2 types of Goals. CTA goals, and Visit goals.
CTA Goals
CTA goals are campaigns you want to run on your website to visitors in that lifecycle stage. The name of your CTA goal should be after the CTA in your funnel you want them to engage with.
If the CTA goal is to capture emails, it may be “Newsletter Subscribe” or “Lead Magnet”.
Adding CTAs to the goal
Once you create a CTA goal, you can add calls-to-action you’ve created in ConvertFlow’s CTA builder to the goal.

You can add as many as you want. So if you created an embedded CTA, a hook and overlay, each prompting visitors to subscribe to your blog, all of these subscribe CTAs can be added to one “Newsletter subscribe” goal in your flow.
Targeting your goal
By adding them to your goal, you can then control the targeting for this set of CTAs, by adding targeting conditions for the goal and activating it by clicking the check box to the top right.
This allows you to setup the targeting for a set of CTAs once, without having to repeat yourself.
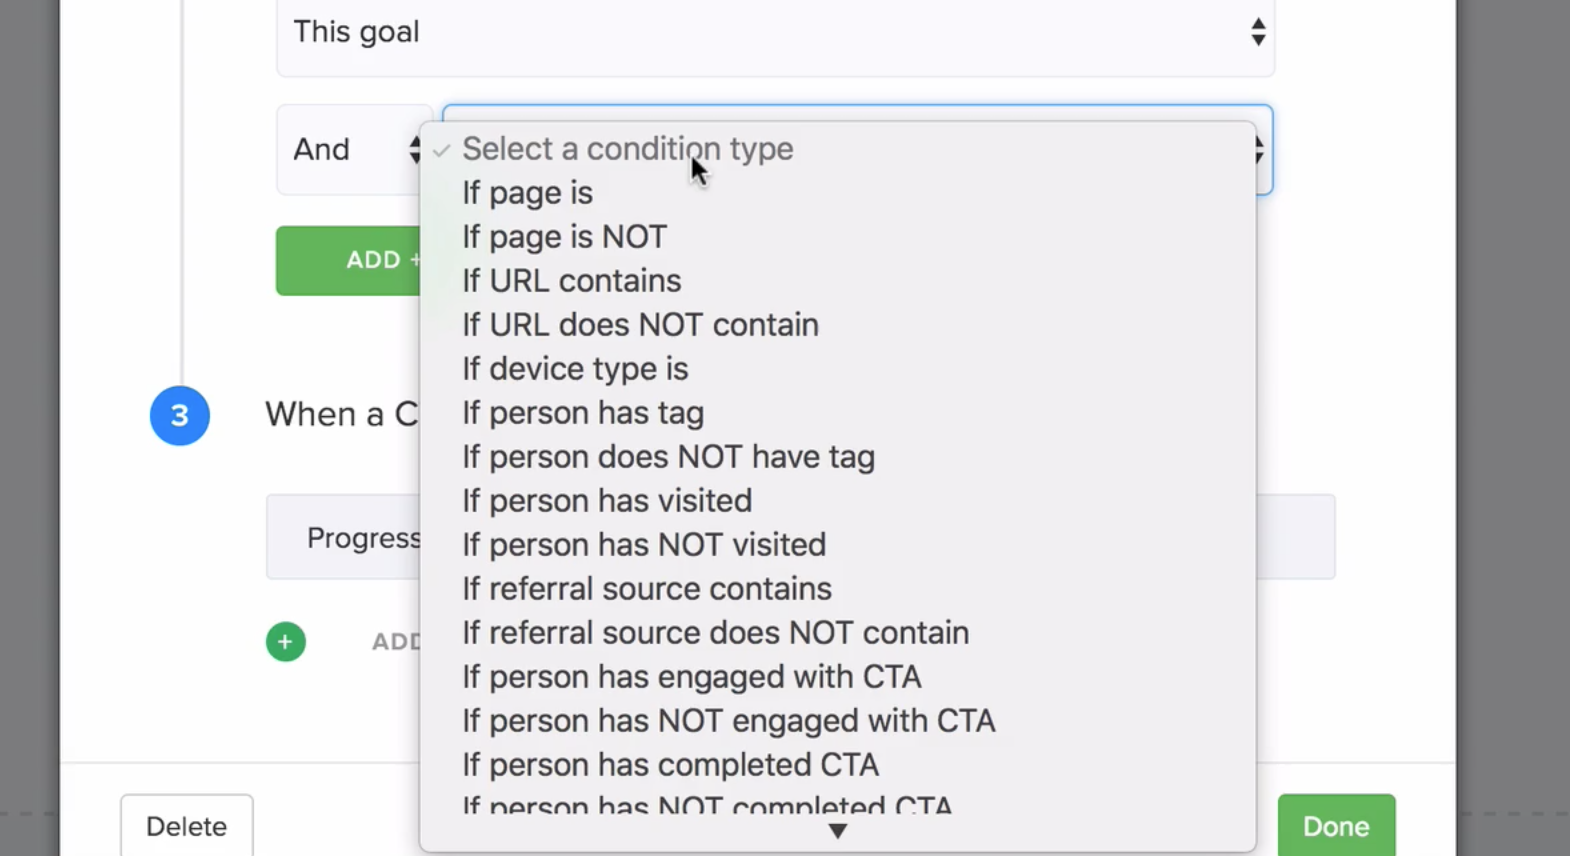
You can also add CTA-specific conditions in the goal, which is useful if you want to limit a CTA in the goal to a certain page, or certain device.
For example, your entire “Newsletter Subscribe” goal could target your blog with an If URL contains ‘blog’ condition, however you can have the overlay only show on desktops using the If device type is desktop condition.
Displaying embedded CTAs added to the goal
When adding embedded CTAs to goals, you'll need to add CTA-specific conditions to the goal to specify which website area you want that embedded CTA to show in, otherwise the embedded CTAs in the goal won’t show.

Adding automations to the goal
You can also add automations to your goal, that will run on your contacts once one of the CTAs in your goal has been completed.
Like targeting conditions for your goal, this allows you to add automations to a set of CTAs just one time, without having to repeatedly add the automations to each CTA.
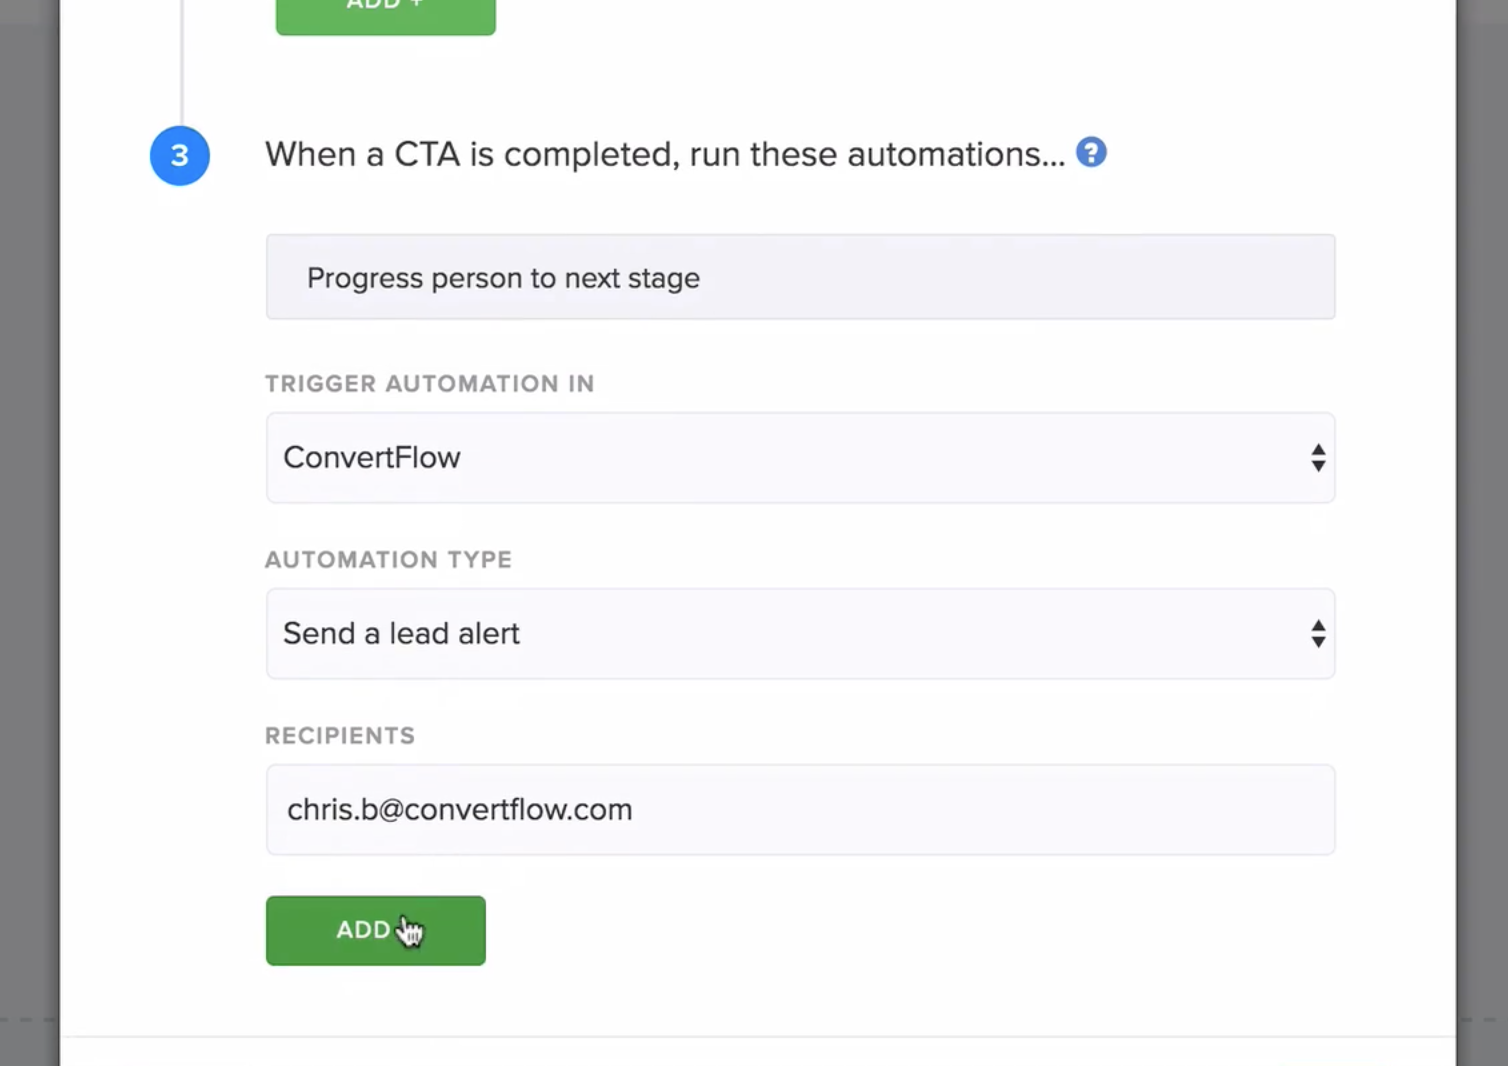
It also let’s you trigger goal specific automations that you may not have your CTAs trigger in other campaigns.
Each goal automatically comes with the automation “Progress person to the next stage”, which will move the visitor to the next stage in the flow upon completing the goal.
This can be removed if you want to control how the flow progression happens upon goal completion.
For example, you may remove the “Progress person to the next stage” if you wanted to add a ConvertFlow automation to skip the next stage of the flow and add them to the third stage, using the “Move to stage” automation type.
Now, what if one of your CTAs in your goal is a multi-step CTA? And you don’t want to complete the CTA goal until the person completes the final step in the CTA?
You can control this, by removing the automatically added “Track completion of CTA” automation from the buttons & forms on the initial steps in your multi-step CTA.
For more info on tracking CTA completions, head here →
Activating your CTA goal
Once you've added CTAs to your goal, set targeting conditions, and added automations to control what happens when the goal is completed, then you'll want to activate your CTA goal by clicking the status toggle at the top right of the goal modal.

Visit Goals
You can also create Visit goals, which allows you to conditionally trigger automations when someone visits your website.
For example, you can create a visit goal for when someone with the “Qualified lead” tag in ActiveCampaign visits a page URL containing “pricing”.
Like with CTA goals, you can add as many targeting conditions and automations as you’d like.
Visit goals are most often used for segmenting visitors, who meet a certain criteria, into later stages of the flow.
Because any automations that are ran due to a visitor completing a Visit goal, happen in real-time upon page visit, Visit goals are most often used for segmenting visitors who meet a certain criteria, into later stages of the flow.
ConvertFlow checks which CTAs to target to the website visitor after any Visit goal’s automations are completed, allowing you to move visitors who shouldn’t see the CTAs out of the stage they are in, into another stage with CTAs they should see.
For example, this may mean moving all of your visitors in the first stage of a new flow that have the “Customer” tag, into the “Customer” stage of the flow.
Other use cases may include triggering automations in your connected marketing tools, like having texts sent to your sales team when qualified visitors visit your purchase page, etc.
Note: You have to activate the Visit goal for it to start taking effect, by clicking the checkbox to the top right when editing the visit goal.
Flow Reporting
By clicking the “Reports” tab in the Flows builder, you can switch to a different page and see stats for your flow.
On the left, you’ll see stats for how many people have entered each stage of the flow. And for each stage, you can see the stats for each goal.
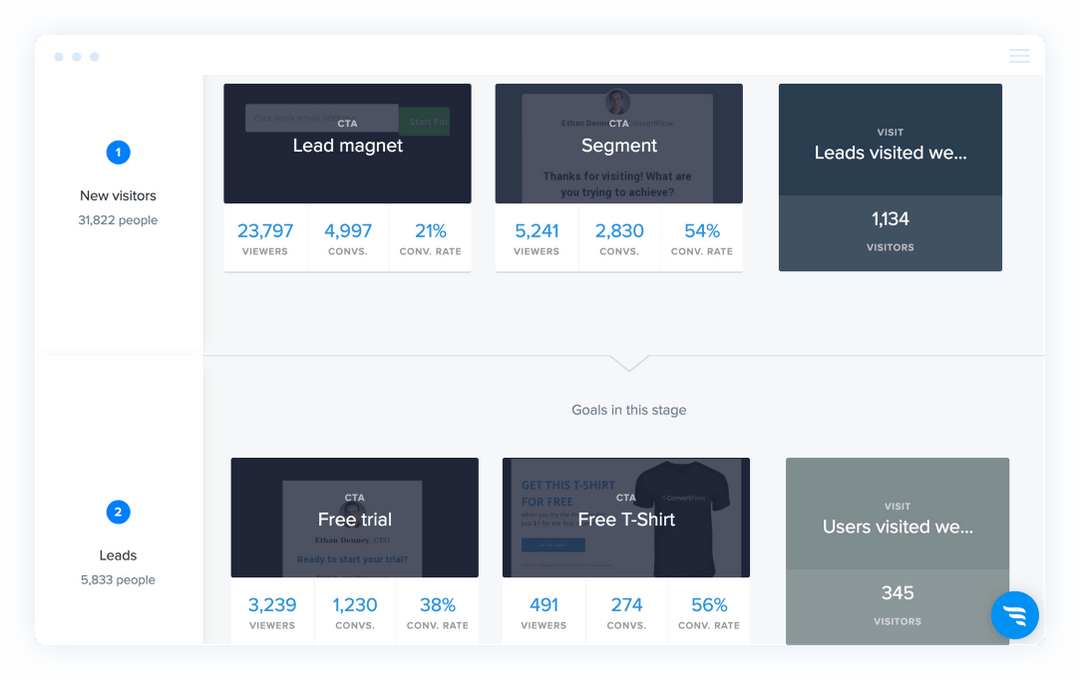
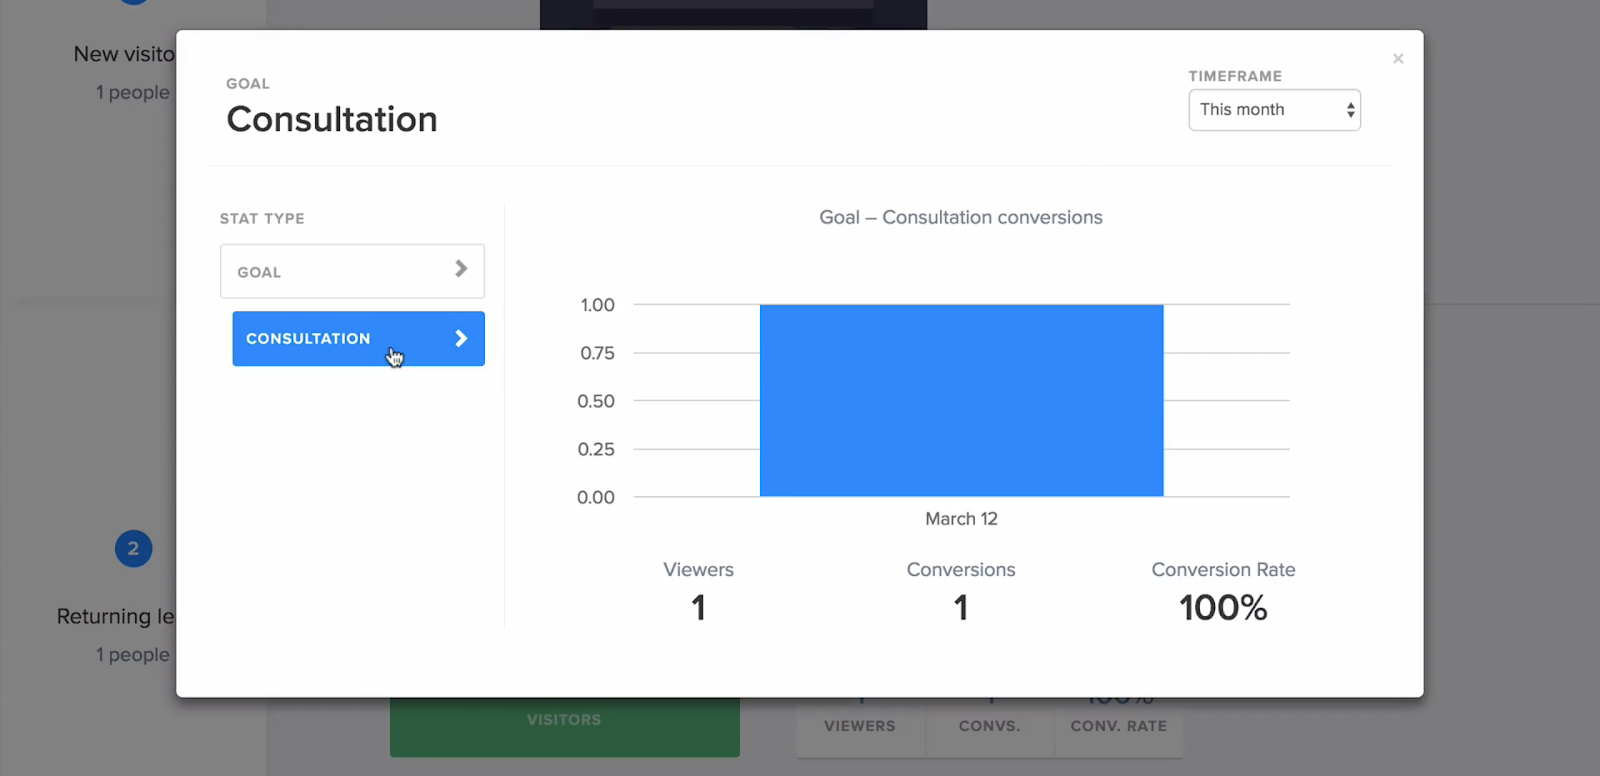
By clicking on a goal, you can drill down into the stats for each CTA in the goal, as well as get reports using date ranges.
Testing Flows on your website
By launching highly targeted CTAs on your website, and targeting them only to certain lifecycle stages using Flows, testing all of this out would be very hard…
That’s why we created the “Admin widget”. When you’re logged into ConvertFlow and you visit your website, you’ll see the ConvertFlow icon on the bottom left.
Click this, and you’ll be able to drill down into each campaign, seeing why it targeting, or why NOT, getting insights into each condition you had added.
You can easily select each Flow targeting you to see which stage you’re in, and which goals are targeting.
Also, you can refresh your ConvertFlow tracking by clicking the "Reset tracking" link, to start over when testing.

And that’s all there is to it! You define your stages, add goals to each stage, set their targeting and automations, and then set it live.
Simple right? Well, it can be. However, the possibilities with flows are endless. Like with any marketing tool, the key to getting results is starting simple, and building outward from there, upon what works.